更新hexo5+next8 更新的hexo5与我原来的旧版的next主题不兼容,所以无法直接在原站点(blog)进行更新。因此,我的做法是直接创建一个新站点(blog_new),然后把原站点(blog)上的文章复制到新站点(blog_new)上。
更新nodejs 使用nvm 安装nvm 略….
更新hexo-cli 安装成功后的效果:
1
2
3
4
5
6
7
8
9
10
11
12
13
14
15
16
17
18
19
20
18190@DESKTOP-SH3MQPI MINGW64 /g/Blog/blog (master) $ hexo version hexo: 4.2.1 hexo-cli: 4.3.0 os: win32 10.0.19043 node: 14.18.2 v8: 8.4.371.23-node.85 uv: 1.42.0 zlib: 1.2.11 brotli: 1.0.9 ares: 1.18.1 modules: 83 nghttp2: 1.42.0 napi: 8 llhttp: 2.1.4 openssl: 1.1.1l cldr: 39.0 icu: 69.1 tz: 2021a unicode: 13.0
hexo init新站点 1 2 3 4 5 6 7 8 9 10 11 12 18190@DESKTOP-SH3MQPI MINGW64 /g/Blog $ hexo init blog_new INFO Cloning hexo-starter https://github.com/hexojs/hexo-starter.git INFO Install dependencies added 252 packages from 208 contributors in 18.717s 15 packages are looking for funding run `npm fund` for details INFO Start blogging with Hexo! 18190@DESKTOP-SH3MQPI MINGW64 /g/Blog
hexo init的站点使用的hexo默认是5.0版本:
1 2 3 4 5 6 7 8 9 10 11 12 13 14 15 16 17 18 19 20 21 22 23 24 25 26 27 28 29 30 31 32 33 34 35 36 37 18190@DESKTOP-SH3MQPI MINGW64 /g/Blog $ cd blog_new/ 18190@DESKTOP-SH3MQPI MINGW64 /g/Blog/blog_new $ ls _config.landscape.yml _config.yml node_modules/ package.json package-lock.json scaffolds/ source/ themes/ 18190@DESKTOP-SH3MQPI MINGW64 /g/Blog/blog_new $ cat package.json { "name": "hexo-site", "version": "0.0.0", "private": true, "scripts": { "build": "hexo generate", "clean": "hexo clean", "deploy": "hexo deploy", "server": "hexo server" }, "hexo": { "version": "" }, "dependencies": { "hexo": "^5.0.0", "hexo-generator-archive": "^1.0.0", "hexo-generator-category": "^1.0.0", "hexo-generator-index": "^2.0.0", "hexo-generator-tag": "^1.0.0", "hexo-renderer-ejs": "^2.0.0", "hexo-renderer-marked": "^4.0.0", "hexo-renderer-stylus": "^2.0.0", "hexo-server": "^2.0.0", "hexo-theme-landscape": "^0.0.3" } } 18190@DESKTOP-SH3MQPI MINGW64 /g/Blog/blog_new
更新新站点下的hexo版本 安装npm-check,若已安装可以跳过
1 npm install -g npm-check
检查系统插件是否需要升级
安装npm-upgrade,若已安装可以跳过
1 npm install -g npm-upgrade
更新package.json中插件的插件版本 输入
命令,然后输入yes选择要更新的插件。
1 2 3 4 5 6 7 8 9 10 11 12 13 14 15 16 17 18 19 20 21 22 23 24 25 26 27 28 29 30 31 18190@DESKTOP-SH3MQPI MINGW64 /g/Blog/blog_new $ npm-upgrade Checking for outdated dependencies for "G:\Blog\blog_new\package.json"... New versions of active modules available: hexo ^5.0.0 → ^5.4.0 hexo-renderer-marked ^4.0.0 → ^4.1.0 hexo-renderer-stylus ^2.0.0 → ^2.0.1 ? Update "hexo" in package.json from ^5.0.0 to ^5.4.0? (Use arrow keys) ? Update "hexo" in package.json from ^5.0.0 to ^5.4.0? Yes ? Update "hexo-renderer-marked" in package.json from ^4.0.0 to ^4.1.0? (Use arro ? Update "hexo-renderer-marked" in package.json from ^4.0.0 to ^4.1.0? Yes ? Update "hexo-renderer-stylus" in package.json from ^2.0.0 to ^2.0.1? (Use arro ? Update "hexo-renderer-stylus" in package.json from ^2.0.0 to ^2.0.1? Yes These packages will be updated: hexo ^5.0.0 → ^5.4.0 hexo-renderer-marked ^4.0.0 → ^4.1.0 hexo-renderer-stylus ^2.0.0 → ^2.0.1 ? Update package.json? (Y/n) yes ? Update package.json? Yes 18190@DESKTOP-SH3MQPI MINGW64 /g/Blog/blog_new
删除新站点已经安装的插件 删除package-lock.json文件和node_modules/目录:
1 2 3 4 5 6 7 8 9 10 11 12 13 14 15 18190@DESKTOP-SH3MQPI MINGW64 /g/Blog/blog_new $ ls _config.landscape.yml _config.yml node_modules/ package.json package-lock.json scaffolds/ source/ themes/ 18190@DESKTOP-SH3MQPI MINGW64 /g/Blog/blog_new $ rm package-lock.json 18190@DESKTOP-SH3MQPI MINGW64 /g/Blog/blog_new $ rm -rf node_modules/ 18190@DESKTOP-SH3MQPI MINGW64 /g/Blog/blog_new $ ls _config.landscape.yml _config.yml package.json scaffolds/ source/ themes/ 18190@DESKTOP-SH3MQPI MINGW64 /g/Blog/blog_new
安装package.json中的插件 1 2 3 4 5 6 7 8 9 10 11 12 13 14 15 16 17 18 19 18190@DESKTOP-SH3MQPI MINGW64 /g/Blog/blog_new $ npm install npm WARN deprecated urix@0.1.0: Please see https://github.com/lydell/urix#deprecated npm WARN deprecated resolve-url@0.2.1: https://github.com/lydell/resolve-url#deprecated npm notice created a lockfile as package-lock.json. You should commit this file. npm WARN optional SKIPPING OPTIONAL DEPENDENCY: fsevents@~2.3.2 (node_modules\chokidar\node_modules\fsevents): npm WARN notsup SKIPPING OPTIONAL DEPENDENCY: Unsupported platform for fsevents@2.3.2: wanted {"os":"darwin","arch":"any"} (current: {"os":"win32","arch":"x64"}) added 252 packages from 208 contributors in 13.869s 15 packages are looking for funding run `npm fund` for details 18190@DESKTOP-SH3MQPI MINGW64 /g/Blog/blog_new $ ls _config.landscape.yml _config.yml node_modules/ package.json package-lock.json scaffolds/ source/ themes/ 18190@DESKTOP-SH3MQPI MINGW64 /g/Blog/blog_new
查看hexo版本 1 2 3 4 5 6 7 8 9 10 11 12 13 14 15 16 17 18 19 20 21 22 23 18190@DESKTOP-SH3MQPI MINGW64 /g/Blog/blog_new $ hexo version INFO Validating config hexo: 5.4.0 hexo-cli: 4.3.0 os: win32 10.0.19043 node: 14.18.2 v8: 8.4.371.23-node.85 uv: 1.42.0 zlib: 1.2.11 brotli: 1.0.9 ares: 1.18.1 modules: 83 nghttp2: 1.42.0 napi: 8 llhttp: 2.1.4 openssl: 1.1.1l cldr: 39.0 icu: 69.1 tz: 2021a unicode: 13.0 18190@DESKTOP-SH3MQPI MINGW64 /g/Blog/blog_new
可以看到hexo已经升级到5.4版本的了。
在新站点安装next主题 hexo 5.x支持通过npm把next主题安装成hexo的插件。
1 npm install hexo-theme-next
安装效果:
1 2 3 4 5 6 7 8 9 10 11 12 13 18190@DESKTOP-SH3MQPI MINGW64 /g/Blog/blog_new $ npm install hexo-theme-next npm WARN optional SKIPPING OPTIONAL DEPENDENCY: fsevents@2.3.2 (node_modules\fsevents): npm WARN notsup SKIPPING OPTIONAL DEPENDENCY: Unsupported platform for fsevents@2.3.2: wanted {"os":"darwin","arch":"any"} (current: {"os":"win32","arch":"x64"}) + hexo-theme-next@8.8.2 added 1 package from 1 contributor in 3.027s 15 packages are looking for funding run `npm fund` for details 18190@DESKTOP-SH3MQPI MINGW64 /g/Blog/blog_new
更新next版本 在hexo站点根目录下:
1 npm install hexo-theme-next@latest
安装效果:
1 2 3 4 5 6 7 8 9 10 11 12 18190@DESKTOP-SH3MQPI MINGW64 /g/Blog/blog_new $ npm install hexo-theme-next@latest npm WARN optional SKIPPING OPTIONAL DEPENDENCY: fsevents@2.3.2 (node_modules\fsevents): npm WARN notsup SKIPPING OPTIONAL DEPENDENCY: Unsupported platform for fsevents@2.3.2: wanted {"os":"darwin","arch":"any"} (current: {"os":"win32","arch":"x64"}) + hexo-theme-next@8.8.2 updated 1 package in 2.924s 15 packages are looking for funding run `npm fund` for details 18190@DESKTOP-SH3MQPI MINGW64 /g/Blog/blog_new
启用next主题 复制next主题的配置文件到站点根目录下 进入站点目录 ,把next主题的配置文件复制到站点根目录下,和hexo的配置文件(_config.yml)放在一起。并且重命名为_config.next.yml:
1 cp node_modules/hexo-theme-next/_config.yml _config.next.yml
此时站点根目录下共有3个配置文件:
1 2 3 4 5 6 7 8 18190@DESKTOP-SH3MQPI MINGW64 /g/Blog/blog_new $ cp node_modules/hexo-theme-next/_config.yml _config.next.yml 18190@DESKTOP-SH3MQPI MINGW64 /g/Blog/blog_new $ ls _config.landscape.yml _config.next.yml _config.yml node_modules/ package.json package-lock.json scaffolds/ source/ themes/ 18190@DESKTOP-SH3MQPI MINGW64 /g/Blog/blog_new
分别是_config.landscape.yml,_config.next.yml,_config.yml。
卸载landscape主题 1 npm uninstall hexo-theme-landscape
运行效果:
1 2 3 4 5 6 7 8 9 10 11 12 13 14 15 16 17 18 19 20 21 22 23 24 25 26 27 28 29 30 31 32 33 34 35 36 37 38 39 40 41 42 43 44 45 46 47 48 49 50 51 52 53 54 55 56 57 58 59 60 61 62 63 64 65 66 67 68 69 70 71 18190@DESKTOP-SH3MQPI MINGW64 /g/Blog/blog_new $ cat package.json { "name": "hexo-site", "version": "0.0.0", "private": true, "scripts": { "build": "hexo generate", "clean": "hexo clean", "deploy": "hexo deploy", "server": "hexo server" }, "hexo": { "version": "5.4.0" }, "dependencies": { "hexo": "^5.4.0", "hexo-generator-archive": "^1.0.0", "hexo-generator-category": "^1.0.0", "hexo-generator-index": "^2.0.0", "hexo-generator-tag": "^1.0.0", "hexo-renderer-ejs": "^2.0.0", "hexo-renderer-marked": "^4.1.0", "hexo-renderer-stylus": "^2.0.1", "hexo-server": "^2.0.0", "hexo-theme-landscape": "^0.0.3", "hexo-theme-next": "^8.8.2" } } 18190@DESKTOP-SH3MQPI MINGW64 /g/Blog/blog_new $ npm uninstall hexo-theme-landscape npm WARN optional SKIPPING OPTIONAL DEPENDENCY: fsevents@2.3.2 (node_modules\fsevents): npm WARN notsup SKIPPING OPTIONAL DEPENDENCY: Unsupported platform for fsevents@2.3.2: wanted {"os":"darwin","arch":"any"} (current: {"os":"win32","arch":"x64"}) removed 1 package in 1.86s 15 packages are looking for funding run `npm fund` for details 18190@DESKTOP-SH3MQPI MINGW64 /g/Blog/blog_new $ cat package.json { "name": "hexo-site", "version": "0.0.0", "private": true, "scripts": { "build": "hexo generate", "clean": "hexo clean", "deploy": "hexo deploy", "server": "hexo server" }, "hexo": { "version": "5.4.0" }, "dependencies": { "hexo": "^5.4.0", "hexo-generator-archive": "^1.0.0", "hexo-generator-category": "^1.0.0", "hexo-generator-index": "^2.0.0", "hexo-generator-tag": "^1.0.0", "hexo-renderer-ejs": "^2.0.0", "hexo-renderer-marked": "^4.1.0", "hexo-renderer-stylus": "^2.0.1", "hexo-server": "^2.0.0", "hexo-theme-next": "^8.8.2" } } 18190@DESKTOP-SH3MQPI MINGW64 /g/Blog/blog_new
删除landscape主题的配置文件 在站点目录下,输入如下命令删除:
1 2 3 4 5 6 7 8 9 10 11 12 18190@DESKTOP-SH3MQPI MINGW64 /g/Blog/blog_new $ ls _config.landscape.yml _config.next.yml _config.yml node_modules/ package.json package-lock.json scaffolds/ source/ themes/ 18190@DESKTOP-SH3MQPI MINGW64 /g/Blog/blog_new $ rm _config.landscape.yml 18190@DESKTOP-SH3MQPI MINGW64 /g/Blog/blog_new $ ls _config.next.yml _config.yml node_modules/ package.json package-lock.json scaffolds/ source/ themes/ 18190@DESKTOP-SH3MQPI MINGW64 /g/Blog/blog_new
hexo启用next主题 进入站点目录,打开hexo的配置文件_config.yml,把landscape替换成next:
查看主题效果 在站点目录下,输入命令:
然后进入http://127.0.0.1:4000/
安装旧站点的插件到新站点: 下面是我旧站点的package.json文件内容:
1 2 3 4 5 6 7 8 9 10 11 12 13 14 15 16 17 18 19 20 21 22 23 24 25 26 27 28 29 30 31 32 33 34 35 18190@DESKTOP-SH3MQPI MINGW64 /g/Blog/blog (master) $ cat package.json { "name": "hexo-site", "version": "0.0.0", "private": true, "scripts": { "build": "hexo generate", "clean": "hexo clean", "deploy": "hexo deploy", "server": "hexo server" }, "hexo": { "version": "4.2.1" }, "dependencies": { "hexo": "^4.2.1", "hexo-abbrlink": "^2.2.1", "hexo-auto-category": "^0.2.1", "hexo-deployer-git": "^3.0.0", "hexo-filter-kroki": "^2.1.8", "hexo-generator-archive": "^1.0.0", "hexo-generator-baidu-sitemap": "^0.1.9", "hexo-generator-category": "^1.0.0", "hexo-generator-index-pin-top": "^0.2.2", "hexo-generator-search": "^2.4.3", "hexo-generator-sitemap": "^2.2.0", "hexo-generator-tag": "^1.0.0", "hexo-reference": "^1.0.4", "hexo-renderer-ejs": "^2.0.0", "hexo-renderer-marked": "^4.1.0", "hexo-renderer-stylus": "^2.0.1", "hexo-server": "^2.0.0" } }
这上面的:
在新站点安装hexo-abbrlink插件 1 2 3 4 5 6 7 8 9 10 11 12 13 14 18190@DESKTOP-SH3MQPI MINGW64 /g/Blog/blog_new $ npm install hexo-abbrlink npm WARN optional SKIPPING OPTIONAL DEPENDENCY: fsevents@2.3.2 (node_modules\fsevents): npm WARN notsup SKIPPING OPTIONAL DEPENDENCY: Unsupported platform for fsevents@2.3.2: wanted {"os":"darwin","arch":"any"} (current: {"os":"win32","arch":"x64"}) + hexo-abbrlink@2.2.1 added 3 packages from 6 contributors in 2.849s 15 packages are looking for funding run `npm fund` for details 18190@DESKTOP-SH3MQPI MINGW64 /g/Blog/blog_new
在新站点安装hexo-filter-kroki插件 1 2 3 4 5 6 7 8 9 10 11 18190@DESKTOP-SH3MQPI MINGW64 /g/Blog/blog_new $ npm install hexo-filter-kroki npm WARN optional SKIPPING OPTIONAL DEPENDENCY: fsevents@2.3.2 (node_modules\fsevents): npm WARN notsup SKIPPING OPTIONAL DEPENDENCY: Unsupported platform for fsevents@2.3.2: wanted {"os":"darwin","arch":"any"} (current: {"os":"win32","arch":"x64"}) + hexo-filter-kroki@2.1.8 added 2 packages from 7 contributors in 2.705s 15 packages are looking for funding run `npm fund` for details
复制旧站点中的文章到新站点 旧站点的重要插件安装到新站点后,就可以把就站点的文章复制到新站点了:
1 2 3 4 18190@DESKTOP-SH3MQPI MINGW64 /g/Blog/blog_new $ cp -r ../blog/source/_posts/* source/_posts/ 18190@DESKTOP-SH3MQPI MINGW64 /g/Blog/blog_new
查看复制来的文章:
1 2 3 4 5 6 7 18190@DESKTOP-SH3MQPI MINGW64 /g/Blog/blog_new $ cd source/_posts/ 18190@DESKTOP-SH3MQPI MINGW64 /g/Blog/blog_new/source/_posts $ ls hello-world.md Hexo/ Windows/ 编程/ 其他/ 随堂笔记/
配置next 8 https://theme-next.js.org/docs/theme-settings/
打开next主题的配置文件:G:\Blog\blog_new_config.next.yml
缓存支持 G:\Blog\blog_new\_config.next.yml 压缩生成的hexo文件 G:\Blog\blog_new\_config.next.yml 选择视图方案 G:\Blog\blog_new\_config.next.yml 我这里用的是Gemini这个Schemes
黑暗模式 G:\Blog\blog_new\_config.next.yml 如果操作系统首选主题是黑暗的,则接下来的主题自动显示黑暗模式。它由MacOS Mojave,iOS 13和Android 10或更高版本支持。
图标 把图标放在hexo站点下的source目录下的images目录下:
1 2 3 18190@DESKTOP-SH3MQPI MINGW64 /g/Blog/blog_new/source/images $ ls apple-touch-icon-next.png avatar.gif favicon.ico favicon-16x16-next.png favicon-32x32-next.png
效果如下:
然后在next的配置文件中设置如下:
G:\Blog\blog_new\_config.next.yml 1 2 3 4 5 6 favicon: small: /images/favicon-16x16-next.png medium: /images/favicon-32x32-next.png apple_touch_icon: /images/apple-touch-icon-next.png safari_pinned_tab: /images/logo.svg
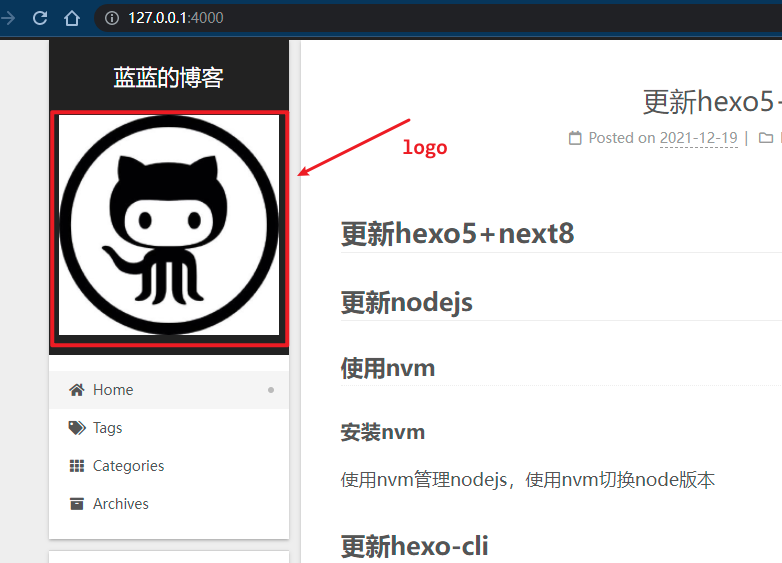
logo G:\Blog\blog_new\_config.next.yml 1 2 3 custom_logo: /images/avatar.gif
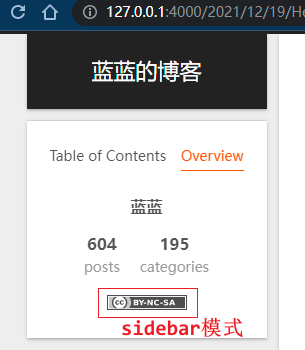
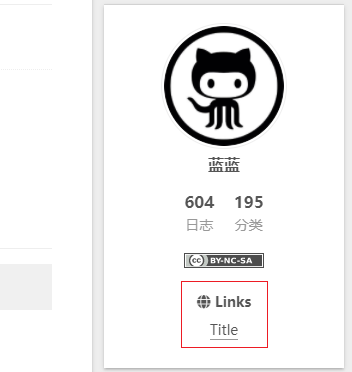
Creative Commons版权声明 版权声明
G:\Blog\blog_new\_config.next.yml 1 2 3 4 5 6 7 8 9 10 11 12 creative_commons: license: by-nc-sa size: small sidebar: true post: true language: deed.zh
sidebar: true时的效果:
配置菜单项 [3]
添加自定义页面 添加tag页面 https://theme-next.js.org/docs/theme-settings/custom-pages.html#Adding-%C2%ABTags%C2%BB-Page
进入站点目录,输入如下命令生成tags页面:
这个命令将在source/目录下生成tags/目录
打开生成的index.md文件,在其frontmatter中加上
如下所示
G:\Blog\blog_new\source\tags\index.md 1 2 3 4 5 --- title: tags date: 2021-12-20 14:07:04 type: tags ---
不然tags页面不会显示任何内容。
G:\Blog\blog_new\_config.next.yml 1 2 3 4 5 6 7 8 9 menu: home: / || fa fa-home tags: /tags/ || fa fa-tags
运行过程:
1 2 3 4 5 6 7 8 9 10 11 12 13 14 15 16 17 18 19 20 21 22 23 24 25 26 18190@DESKTOP-SH3MQPI MINGW64 /g/Blog/blog_new $ hexo new page tags INFO Validating config INFO ================================== ███╗ ██╗███████╗██╗ ██╗████████╗ ████╗ ██║██╔════╝╚██╗██╔╝╚══██╔══╝ ██╔██╗ ██║█████╗ ╚███╔╝ ██║ ██║╚██╗██║██╔══╝ ██╔██╗ ██║ ██║ ╚████║███████╗██╔╝ ██╗ ██║ ╚═╝ ╚═══╝╚══════╝╚═╝ ╚═╝ ╚═╝ ======================================== NexT version 8.8.2 Documentation: https://theme-next.js.org ======================================== INFO Created: G:\Blog\blog_new\source\tags\index.md 18190@DESKTOP-SH3MQPI MINGW64 /g/Blog/blog_new $ ls _config.next.yml _config.yml db.json node_modules/ package.json package-lock.json scaffolds/ source/ themes/ 18190@DESKTOP-SH3MQPI MINGW64 /g/Blog/blog_new $ ls source/ _posts/ categories/ images/ tags/ 18190@DESKTOP-SH3MQPI MINGW64 /g/Blog/blog_new
Tagcloud标签云 G:\Blog\blog_new\_config.next.yml 1 2 3 4 5 6 7 tagcloud: min: 12 max: 30 amount: 200 orderby: name order: 1
添加Categories页面 插件hexo-generator-category Categories页面是hexo-generator-category这个插件提供的功能。这个插件在hexo init站点的时候就已经安装好了。我们不用自己去安装。
创建categories目录 进入站点目录,输入如下命令:
1 hexo new page categories
这个命令将会在站点的source/目录下生成一个categories/目录。并在categories/目录中生成一个index.md的文件。
命令运行效果如下所示:
1 2 3 4 5 6 7 8 9 10 11 12 13 14 15 16 17 18 19 20 21 22 23 24 25 26 27 28 29 30 18190@DESKTOP-SH3MQPI MINGW64 /g/Blog/blog_new $ ls _config.next.yml _config.yml db.json node_modules/ package.json package-lock.json public/ scaffolds/ source/ themes/ 18190@DESKTOP-SH3MQPI MINGW64 /g/Blog/blog_new $ ls source/ _posts/ images/ 18190@DESKTOP-SH3MQPI MINGW64 /g/Blog/blog_new $ hexo new page categories INFO Validating config INFO ================================== ███╗ ██╗███████╗██╗ ██╗████████╗ ████╗ ██║██╔════╝╚██╗██╔╝╚══██╔══╝ ██╔██╗ ██║█████╗ ╚███╔╝ ██║ ██║╚██╗██║██╔══╝ ██╔██╗ ██║ ██║ ╚████║███████╗██╔╝ ██╗ ██║ ╚═╝ ╚═══╝╚══════╝╚═╝ ╚═╝ ╚═╝ ======================================== NexT version 8.8.2 Documentation: https://theme-next.js.org ======================================== INFO Created: G:\Blog\blog_new\source\categories\index.md 18190@DESKTOP-SH3MQPI MINGW64 /g/Blog/blog_new $ ls source/ _posts/ categories/ images/ 18190@DESKTOP-SH3MQPI MINGW64 /g/Blog/blog_new
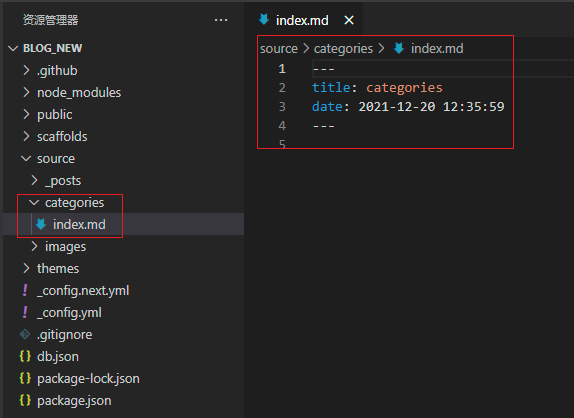
进入categories/目录,打开里面的index.md文件,在其中加上:
如下所示:
G:\Blog\blog_new\source\categories\index.md 1 2 3 4 5 --- title: categories date: 2021-12-20 12:35:59 type: categories ---
如果没有加上type: categories,则categories页面讲不会显示内容。
在next配置文件中打开categories/页面 打开next的配置文件,找到menu:,取消categories:项的注释
1 2 3 4 5 6 7 8 9 10 11 12 13 menu: home: / || fa fa-home categories: /categories/ || fa fa-th
谷歌日历 https://theme-next.js.org/docs/theme-settings/custom-pages.html#Adding-Google-Calendar-Page
添加自定义404页面 https://theme-next.js.org/docs/theme-settings/custom-pages.html#Custom-404-Page
创建404页面 进入hexo站点根目录,输入如下命令创建404页面:
关闭hexo的relative_link 打开hexo的配置文件,把relative_link设置为false:
G:\Blog\blog_new\_config.yml 是否支持重定向到404页面,需要托管hexo站点的网站的支持。这个是hexo无法决定的。
站点地图 安装hexo-generator-sitemap插件 编辑404/index.md页面 G:\Blog\blog_new\source\404\index.md 1 2 3 4 5 6 7 8 --- title: '404' date: 2014-12-22 12:39:04 comments: false --- <script src ="//qzonestyle.gtimg.cn/qzone/hybrid/app/404/search_children.js" charset ="utf-8" homePageUrl ="/" homePageName ="Back to home" > </script >
打开next主题的404菜单项 打开next主题的配置文件,取消404菜单项的注释:
G:\Blog\blog_new\_config.next.yml 1 2 3 4 5 6 7 8 9 menu: home: / || fa fa-home commonweal: /404/ || fa fa-heartbeat
动态子菜单 动态子菜单可在next主题的配置文件的menu:下设置,如下所示
G:\Blog\blog_new\_config.next.yml 1 2 3 4 5 6 7 8 9 10 11 12 13 menu: home: / || fa fa-home archives: /archives/ || fa fa-archive Docs: default: /docs/ || fa fa-book Getting Started: default: /getting-started/ || fa fa-flag Installation: /installation.html || fa fa-download Configuration: /configuration.html || fa fa-wrench Third Party Services: default: /third-party-services/ || fa fa-puzzle-piece Math Equations: /math-equations.html || fa fa-square-root-alt Comment Systems: /comments.html || fa fa-comment-alt
https://theme-next.js.org/docs/theme-settings/sidebar.html
侧边栏样式 https://theme-next.js.org/docs/theme-settings/sidebar.html#Sidebar-Style
侧边栏位置 G:\Blog\blog_new\_config.next.yml 1 2 3 4 sidebar: position: right
侧边栏宽度 Muse和Mist默认宽度是320px,和Pisces和Gemini默认是240px。你可以根据自己的需要进行调整:
G:\Blog\blog_new\_config.next.yml 1 2 3 4 5 6 sidebar: ...... width: 300
侧边栏显示方式 post → Show sidebar only in posts which have index.
G:\Blog\blog_new\_config.next.yml 1 2 3 4 5 6 sidebar: display: post
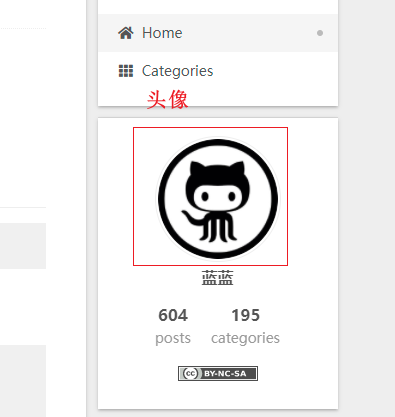
设置头像 https://theme-next.js.org/docs/theme-settings/sidebar.html#Configuring-Avatar
G:\Blog\blog_new\_config.next.yml 1 2 3 4 5 6 7 8 avatar: url: /images/avatar.gif rounded: true rotated: false
显示效果如下:
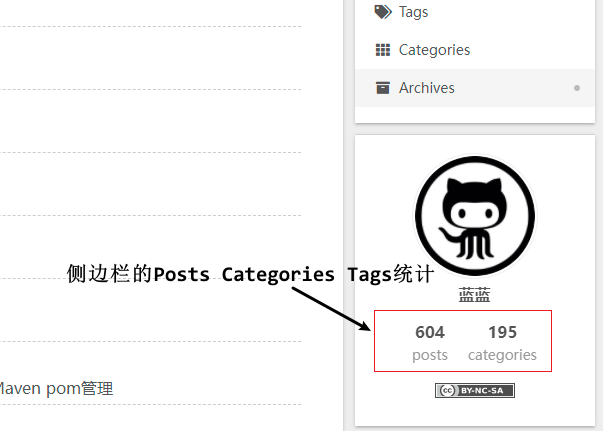
侧边栏的Posts Categories Tags统计 https://theme-next.js.org/docs/theme-settings/sidebar.html#Sidebar-Site-State
G:\Blog\blog_new\_config.next.yml 显示效果:
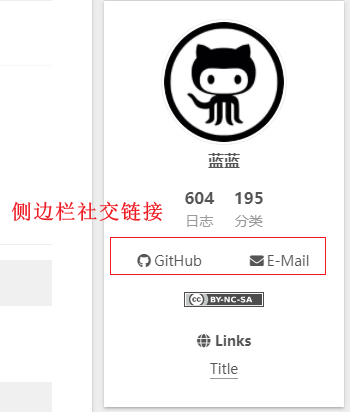
侧边栏的社交链接 https://theme-next.js.org/docs/theme-settings/sidebar.html#Sidebar-Social-Links
G:\Blog\blog_new\_config.next.yml 1 2 3 4 5 6 7 8 9 10 11 12 13 14 15 16 social: GitHub: https://github.com/yourname || fab fa-github E-Mail: mailto:yourname@gmail.com || fa fa-envelope social_icons: enable: true icons_only: false transition: false
显示效果:
点击社交连接,浏览器会以新标签打开这个链接 。
侧边栏的站内滚动链接 点击这个链接,浏览器会在当前标签页打开这个链接,之前页面的内容会被覆盖。
G:\Blog\blog_new\_config.next.yml 1 2 3 4 5 6 7 8 9 links_settings: icon: fa fa-globe title: Links layout: block links: Title: https://example.com
显示效果:
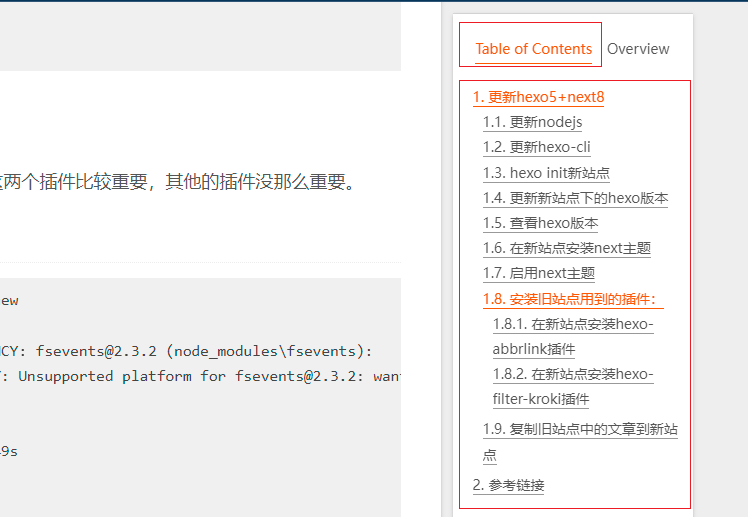
侧栏的文章目录 https://theme-next.js.org/docs/theme-settings/sidebar.html#Sidebar-TOC
G:\Blog\blog_new\_config.next.yml 1 2 3 4 5 6 7 8 9 10 11 12 toc: enable: true number: true wrap: true expand_all: false max_depth: 6
显示效果:
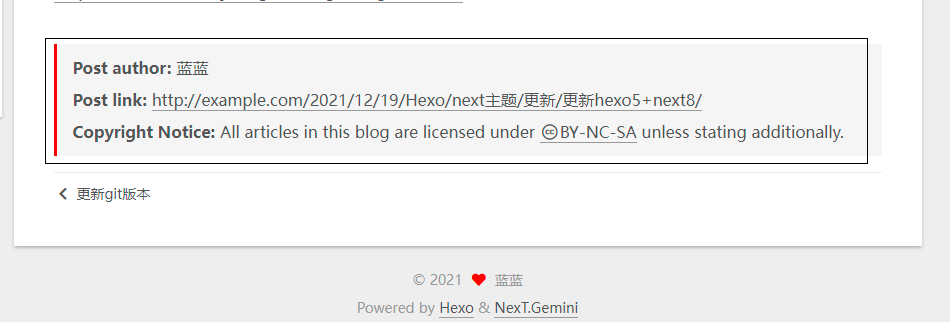
https://theme-next.js.org/docs/theme-settings/footer.html
站点开始时间 G:\Blog\blog_new\_config.next.yml 页脚图标 G:\Blog\blog_new\_config.next.yml 1 2 3 4 5 6 7 8 9 10 footer: ... icon: name: fa fa-heart animated: true color: "#ff0000"
网站版权名称 G:\Blog\blog_new\_config.next.yml 如果不设置的话,则显示作者的信息。
是否显示网站的构建平台 G:\Blog\blog_new\_config.next.yml 如果设置范位false,则会隐藏页脚下的类似Powered by Hexo & NexT.Gemini信息
网站备案信息 G:\Blog\blog_new\_config.next.yml 1 2 3 4 5 6 7 8 footer: beian: enable: true icp: 京ICP备 1234567890 号-1 gongan_id: 1234567890 gongan_num: 京公网安备 1234567890 号 gongan_icon_url: /uploads/beian.png
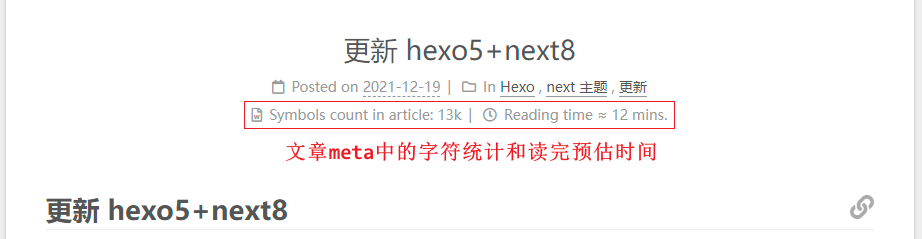
帖子设置 文章设置 https://theme-next.js.org/docs/theme-settings/posts.html
序言文本 在文章中使用<!-- more -->显式隔开前言和正文。
文章元信息 G:\Blog\blog_new\_config.next.yml 1 2 3 4 5 6 7 8 post_meta: item_text: true created_at: true updated_at: enable: true another_day: true categories: true
文章字数统计 安装插件 进入站点目录,输入如下命令安装字数统计插件:
1 npm install hexo-word-counter
在hexo配置文件中配置 G:\Blog\blog_new\_config.yml 1 2 3 4 5 6 7 8 9 10 11 12 13 14 15 symbols_count_time: symbols: true time: true total_symbols: true total_time: true awl: 4 wpm: 275
在next配置文件中配置 G:\Blog\blog_new\_config.next.yml 1 2 3 symbols_count_time: separated_meta: true item_text_total: true
查看效果 先执行:
全站点的字符统计
捐赠设置 https://theme-next.js.org/docs/theme-settings/posts.html#Donate-Settings
Follow Me https://theme-next.js.org/docs/theme-settings/posts.html#Follow-Me
相关热门帖子 https://theme-next.js.org/docs/theme-settings/posts.html#Related-Popular-Posts
安装插件 进入后hexo站点目录,安装如下插件
1 npm install hexo-related-popular-posts
Post Edit https://theme-next.js.org/docs/theme-settings/posts.html#Post-Edit
显示上一个帖子和下一个帖子 https://theme-next.js.org/docs/theme-settings/posts.html#Post-Navigation
自定义页面 https://theme-next.js.org/docs/theme-settings/custom-pages.html
使用存档页作为主页 https://theme-next.js.org/docs/theme-settings/custom-pages.html#Use-Archive-Page-as-Home-Page
这个功能真是把主页和归档页做了调换而已。设置之后原来的主页变成了归档页,原来的归档页则显示主页的内容。
没有达到我想要的效果
这几个在上面已经介绍过了。
添加Categories页面 添加 Google Calendar页面 杂项主题设置 https://theme-next.js.org/docs/theme-settings/miscellaneous.html
预连接 https://theme-next.js.org/docs/theme-settings/miscellaneous.html#Preconnect
文本对齐 https://theme-next.js.org/docs/theme-settings/miscellaneous.html#Mobile-Devices-Adaptation
移动设备适配 https://theme-next.js.org/docs/theme-settings/miscellaneous.html#Mobile-Devices-Adaptation
亮色和深色主题颜色 https://theme-next.js.org/docs/theme-settings/miscellaneous.html#Theme-Color
滚动条设置 https://theme-next.js.org/docs/theme-settings/miscellaneous.html#Body-Scrollbar
代码块样式 代码块赋值按钮 G:\Blog\blog_new\_config.next.yml 1 2 3 4 5 6 7 8 9 10 11 12 13 14 codeblock: theme: light: default dark: tomorrow-night prism: light: prism dark: prism-dark copy_button: enable: true style:
返回顶部按钮 https://theme-next.js.org/docs/theme-settings/miscellaneous.html#Back-To-Top
G:\Blog\blog_new\_config.next.yml 1 2 3 4 5 6 back2top: enable: true sidebar: true scrollpercent: true
阅读进度 显示条 https://theme-next.js.org/docs/theme-settings/miscellaneous.html#Reading-Progress
G:\Blog\blog_new\_config.next.yml 1 2 3 4 5 6 7 8 9 10 reading_progress: enable: true start_at: left position: top reversed: false color: "#37c6c0" height: 3px
书签Bookmark https://theme-next.js.org/docs/theme-settings/miscellaneous.html#Bookmark
1 2 3 4 5 6 7 8 bookmark: enable: true color: "#222" save: auto
GitHub横幅 https://theme-next.js.org/docs/theme-settings/miscellaneous.html#GitHub-Banner Follow me on GitHub横幅。
字体定制 https://theme-next.js.org/docs/theme-settings/miscellaneous.html#Fonts-Customization
搜索引擎优化设置 https://theme-next.js.org/docs/theme-settings/seo.html
显示副标题 站长工具 网站管理员工具 https://theme-next.js.org/docs/theme-settings/seo.html#Webmaster-Tools
国际化 https://theme-next.js.org/docs/theme-settings/internationalization.html
设置成中文简体 https://theme-next.js.org/docs/theme-settings/internationalization.html#Choosing-Language
G:\Blog\blog_new\_config.yml 多语言切换 https://theme-next.js.org/docs/theme-settings/internationalization.html#Multilingual-Switcher
G:\Blog\blog_new\_config.yml 1 2 3 language: - zh-CN - en
next第三方服务 数学公式引擎 https://theme-next.js.org/docs/third-party-services/math-equations.html
评论系统 https://theme-next.js.org/docs/third-party-services/comments.html
在线编辑 https://theme-next.js.org/docs/third-party-services/post-widgets.html
统计和分析 百度分析 https://theme-next.js.org/docs/third-party-services/statistics-and-analytics.html#Baidu-Analytics-China
G:\Blog\blog_new\_config.next.yml 1 2 baidu_analytics: your_id
LeanCloud统计(国内) https://theme-next.js.org/docs/third-party-services/statistics-and-analytics.html#LeanCloud-China
搜索服务 Local Search https://theme-next.js.org/docs/third-party-services/search-services.html#Local-Search
安装插件 进入站点根目录,输入如下命令
1 npm install hexo-generator-searchdb
在hexo配置文件中添加配置 G:\Blog\blog_new\_config.yml 1 2 3 4 5 6 7 8 search: path: search.xml field: post content: true format: html
编辑next配置文件 G:\Blog\blog_new\_config.next.yml 1 2 3 4 5 6 7 8 9 10 11 12 13 local_search: enable: true trigger: auto top_n_per_article: 1 unescape: false preload: false
聊天服务 https://theme-next.js.org/docs/third-party-services/chat-services.html
外部库 https://theme-next.js.org/docs/third-party-services/external-libraries.html
高级设置 自定义文件 https://theme-next.js.org/docs/advanced-settings/custom-files.html
自定义CSS 自定义代码块字体大小 NexT默认的代码块字体大小为1em;。当代码块中的代码比较长时,代码块无法全部显示这样代码,当我们阅读的时候就需要频繁拖动底部的滚动条。为了方便阅读,我们可以把代码块中的字体大小调小到0.875em;。source/_data目录下创建styles.styl文件
1 2 3 4 5 18190@DESKTOP-SH3MQPI MINGW64 /g/Blog/blog_new/source/_data (master) $ ls languages.yml styles.styl 18190@DESKTOP-SH3MQPI MINGW64 /g/Blog/blog_new/source/_data (master)
然后在里面styles.styl文件中写上你的css代码即可。
G:\Blog\gongzuo_new\source\_data\styles.styl 1 2 3 4 // 代码块的字体大小 figure .highlight , pre span { font-size : 0.875em ; }
部署 部署到github pages 安装插件 在站点根目录中输入如下命令安装插件:
1 npm install hexo-deployer-git --save
安装效果如下:
1 2 3 4 5 6 7 8 9 10 11 12 13 14 15 16 18190@DESKTOP-SH3MQPI MINGW64 /g/Blog/blog_new $ npm install hexo-deployer-git --save added 1 package, and audited 263 packages in 3s 16 packages are looking for funding run `npm fund` for details 1 moderate severity vulnerability Some issues need review, and may require choosing a different dependency. Run `npm audit` for details. 18190@DESKTOP-SH3MQPI MINGW64 /g/Blog/blog_new
在hexo配置文件中填写github pages的配置 1 2 3 4 5 6 7 8 deploy: type: git repo: git@github.com:你的用户名/仓库名.git branch: gh-pages
部署 在站点根目录下输入如下命令:
部署成功效果:
1 2 3 4 5 6 7 8 9 10 11 12 13 14 15 16 17 18 19 20 21 create mode 100644 page/9/index.html delete mode 100644 placeholder create mode 100644 search.xml create mode 100644 tags/index.html Enumerating objects: 2485, done. Counting objects: 100% (2485/2485), done. Delta compression using up to 4 threads Compressing objects: 100% (1342/1342), done. Writing objects: 100% (2485/2485), 5.29 MiB | 1.28 MiB/s, done. Total 2485 (delta 1147), reused 0 (delta 0), pack-reused 0 remote: Resolving deltas: 100% (1147/1147), done. remote: remote: GitHub found 1 vulnerability on lanlan2017/blog's default branch (1 moderate). To find out more, visit: remote: https://github.com/lanlan2017/blog/security/dependabot/package.json/hexo/open remote: To github.com:lanlan2017/blog.git + 9c1e805...44e4c22 HEAD -> gh-pages (forced update) Branch 'master' set up to track remote branch 'gh-pages' from 'git@github.com:lanlan2017/blog.git'. INFO Deploy done: git 18190@DESKTOP-SH3MQPI MINGW64 /g/Blog/blog_new
替代旧站点 到这里,旧站点已经可以替代了,可以把旧站点blog/删除掉,然后把blog_new/站点重命名为blog_new即可。
复制旧站点的.git目录到新站点 如果在blog_new上重新执行git init命令,我还得重新配置git。
然后就可以像原来的站点那样使用git了。
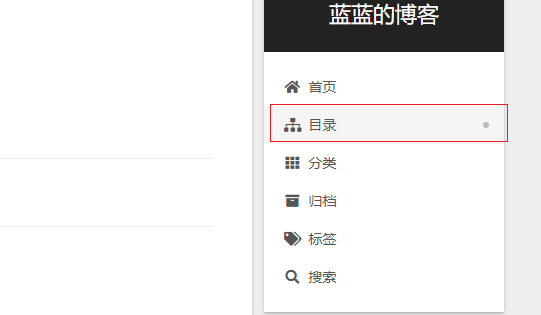
创建自定义的dir目录 创建dir页面 运行效果:
1 2 3 4 5 6 7 8 9 10 11 12 13 14 15 16 17 18190@DESKTOP-SH3MQPI MINGW64 /g/Blog/blog_new (master) $ hexo new page dir INFO Validating config INFO ================================== ███╗ ██╗███████╗██╗ ██╗████████╗ ████╗ ██║██╔════╝╚██╗██╔╝╚══██╔══╝ ██╔██╗ ██║█████╗ ╚███╔╝ ██║ ██║╚██╗██║██╔══╝ ██╔██╗ ██║ ██║ ╚████║███████╗██╔╝ ██╗ ██║ ╚═╝ ╚═══╝╚══════╝╚═╝ ╚═╝ ╚═╝ ======================================== NexT version 8.8.2 Documentation: https://theme-next.js.org ======================================== INFO Created: G:\Blog\blog_new\source\dir\index.md 18190@DESKTOP-SH3MQPI MINGW64 /g/Blog/blog_new (master)
编写dir页面 编写G:\Blog\blog_new\source\dir\index.md文件
G:\Blog\blog_new\_config.next.yml 1 2 3 4 5 6 7 8 9 10 menu: home: / || fa fa-home dir: /dir/ || fa fa-sitemap categories: /categories/ || fa fa-th archives: /archives/ || fa fa-archive tags: /tags/ || fa fa-tags
给dir页面提供翻译 https://theme-next.js.org/docs/theme-settings/internationalization.html#Override-Default-Translations
创建文件source/_data/languages.yml 在source/目录下创建_data/目录,并在_data/目录中创建languages.yml文件:
1
2
3
4
5
6
7
8
9
10
11
12
13
14
15
16
17
18
19
20
21
22
23
18190@DESKTOP-SH3MQPI MINGW64 /g/Blog/blog_new (master) $ ls _config.next.yml db.json HexoD.bat HexoSTest.bat package.json public/ source/ themes/ _config.yml FM.properties HexoS.bat node_modules/ package-lock.json scaffolds/ StartWriting.bat 18190@DESKTOP-SH3MQPI MINGW64 /g/Blog/blog_new (master) $ mkdir source/_data 18190@DESKTOP-SH3MQPI MINGW64 /g/Blog/blog_new (master) $ ls source/ _data/ _posts/ categories/ dir/ images/ tags/ 18190@DESKTOP-SH3MQPI MINGW64 /g/Blog/blog_new (master) $ cd source/_data/ 18190@DESKTOP-SH3MQPI MINGW64 /g/Blog/blog_new/source/_data (master) $ touch languages.yml 18190@DESKTOP-SH3MQPI MINGW64 /g/Blog/blog_new/source/_data (master) $ ls languages.yml 18190@DESKTOP-SH3MQPI MINGW64 /g/Blog/blog_new/source/_data (master)
编辑languages.yml G:\Blog\blog_new\source\_data\languages.yml 1 2 3 4 5 6 7 zh-CN: menu: dir: 目录 en: menu: dir: directories
查看效果 输入hexo s,效果如下图: