19.3 数据绑定范例
19.3 数据绑定范例
在表单标签库中利用标签进行数据绑定的例子,见app19a 应用程序。这个范例围绕着domain类Book进行。这个类中有几个属性,包括一个类型为Category的category属性。Category有id和name两个属性。
这个应用程序允许列出书目、添加新书,以及编辑书目。
19.3.1 目录结构
下面是app19a的目录结构。
1 | E:\workspace_web\app19a |
19.3.2Domain类
Book类和Category类是这个应用程序中的domain类,它们分别如清单19.1和清单19.2所示。
清单19.1Book类
1 | package app19a.domain; |
Category类
1 | package app19a.domain; |
19.3.3Controller类
下面的范例为Book提供了一个controller:BookController类。它允许用户创建新书目、更新书的详细信息,并在系统中列出所有书目。清单19.3中展示了BookController类。
BookController类
1 | package app19a.controller; |
BookController依赖BookService进行一些后台处理。@Autowired注解用于给BookController注入一个BookService实现:
1 |
|
19.3.4 Service类
清单19.4和清单19.5分别展示了BookService接口和BookServiceImpl类。顾名思义,BookServiceImpl就是实现BookService。
BookService接口
1 | package app19a.service; |
BookServiceImpl类
1 | package app19a.service; |
BookServiceImpl类中包含了一个Book对象的List和一个Category对象的List。这两个List都是在实例化类时生成的。这个类中还包含了获取所有书目、获取单个书目以及添加和更新书目的方法。
19.3.5 配置文件
清单19.6展示了app19a中的Spring MVC配置文件。
SpringMVC配置文件
1 |
|
component-scan bean使得app19a.controller包和app19a.service包得以扫描。
19.3.6 视图
app19a中使用的3个JSP页面如清单19.7、清单19.8和清单19.9所示。BookAddForm.jsp和BookEditForm.jsp页面中使用的是来自表单标签库的标签。
清单19.7 BookList.jsp页面
1 | <%@ taglib uri="http://java.sun.com/jsp/jstl/core" prefix="c"%> |
清单19.8 BookAddForm.jsp页面
1 | <%@ taglib prefix="form" uri="http://www.springframework.org/tags/form"%> |
清单19.9 BookEditForm.jsp页面
1 | <%@ taglib prefix="form" uri="http://www.springframework.org/tags/form"%> |
19.3.7 测试应用
要想测试这个应用程序范例,请打开以下网页:
http://localhost:8080/app19a/book_list
图19.2所示为第一次启动这个应用程序时显示的书目列表。
单击Add Book链接添加书目,或者单击书籍详情右侧的Edit链接来编辑书目。
图19.3所示为Add Book表单。图19.4所示为EditBook表单。
19.2 表单标签库
19.2 表单标签库
表单标签库中包含了可以用在JSP页面中渲染HTML元素的标签。为了使用这些标签,必须在JSP页面的开头处声明这个taglib指令:
1 | <% prefix="form" |
表单标签库中的标签
表19.1展示了表单标签库中的标签。
| 标签 | 描述 |
|---|---|
form |
渲染表单元素 |
input |
渲染<input type="text"/>元素 |
password |
渲染<input type="password"/>元素 |
hidden |
渲染<input type="hidden"/>元素 |
textarea |
渲染textarea元素 |
checkbox |
渲染一个<input type="checkbox"/>元素 |
checkboxes |
渲染多个<input type="checkbox"/>元素 |
radiobutton |
渲染一个<input type="radio"/>元素 |
radiobuttons |
渲染多个<input type="radio"/>元素 |
Select |
渲染一个选择元素 |
option |
渲染一个可选元素 |
options |
渲染一个可选元素列表 |
Errors |
在span元素中渲染字段错误 |
| 在接下来的小节中,将逐一介绍这些标签。19.3节“数据绑定范例”展示了一个范例应用程序,示范了数据绑定结合表单标签库的使用方法。 |
第19章 数据绑定和表单标签库 19.1 数据绑定概览
第19章 数据绑定和表单标签库
数据绑定是将用户输入绑定到领域模型的一种特性。有了数据绑定,类型总是为String的HTTP请求参数,可用于填充不同类型的对象属性。数据绑定使得form bean(如前面章节中的ProductForm实例)变成多余的。
为了高效地使用数据绑定,还需要Spring的表单标签库。本章着重介绍数据绑定和表单标签库,并提供范例,示范表单标签库中这些标签的用法。
19.1 数据绑定概览
基于HTTP的特性,所有HTTP请求参数的类型均为字符串。在前面的章节中,为了获取正确的产品价格,不得不将字符串解析成浮点(float)类型。为了便于复习,这里把app18a中ProductController类的saveProduct方法的部分代码复制过来了:
1 |
|
之所以需要解析ProductForm中的price属性,是因为它是一个String,需要用float来填充Product的price属性。有了数据绑定,就可以用下面的代码取代上面的saveProduct方法部分:
1 |
|
有了数据绑定,就不再需要ProductForm类,也不需要解析Product对象的price属性了。
数据绑定的另一个好处是:当输入验证失败时,它会重新生成一个HTML表单。手工编写HTML代码时,必须记住用户之前输入的值,重新填充输入字段。有了Spring的数据绑定和表单标签库后,它们就会替你完成这些工作。
18.7 @ModelAttribute
18.7 @ModelAttribute
前面谈到Spring MVC在每次调用请求处理方法时,都会创建Model类型的一个实例。若打算使用该实例,则可以在方法中添加一个Model类型的参数。事实上,还可以使用在方法中添加ModelAttribute注解类型来访问Model实例。该注解类型也是org.springframework. web.bind.annotation包的成员。
可以用@ModelAttribute来注解方法参数或方法。带@ModelAttribute注解的方法会将其输入的或创建的参数对象添加到Model对象中(若方法中没有显式地添加)。例如,Spring MVC将在每次调用submitOrder方法时创建一个Order实例:
1 |
|
输入或创建的Order实例将用newOrder键值添加到Model对象中。如果未定义键值名,则将使用该对象类型的名称。例如,每次调用如下方法,会使用键值order将Order实例添加到Model对象中:
1 | public String submitOrder( |
@ModelAttribute的第二个用途是标注一个非请求的处理方法。被@ModelAttribute注解的方法会在每次调用该控制器类的请求处理方法时被调用。这意味着,如果一个控制器类有两个请求处理方法,以及一个有@ModelAttribute注解的方法,该方法的调用就会比每个处理请求方法更频繁。Spring MVC会在调用请求处理方法之前调用带@ModelAttribute注解的方法。带@ModelAttribute注解的方法可以返回一个对象或一个void类型。如果返回一个对象,则返回对象会自动添加到Model中:
1 |
|
若方法返回void,则还必须添加一个Model类型的参数,并自行将实例添加到Model中。如下面的例子所示:
1 |
|
18.6 请求参数和路径变量
18.6 请求参数和路径变量
请求参数和路径变量都可以用于发送值给服务器。二者都是URL的一部分。请求参数采用key=value形式,并用“&”分隔。例如,下面的URL带有一个名为productId的请求参数,其值为3:
1 | http://localhost:8080/app18b/product_retrieve?productId=3 |
在传统的Servlet编程中,可以使用HttpServletRequest的getParameter方法来获取一个请求参数值:
1 | String productId = httpServletRequest.getParameter("productId"); |
Spring MVC提供了一个更简单的方法来获取请求参数值:通过使用org.springframework.web.bind.annotation.RequestParam注解类型来注解方法参数。例如,下面的方法包含了一个获取请求参数productId值的参数:
1 | public void sendProduct( int productId) |
正如你所看到的,@RequestParam注解的参数类型不一定是字符串。
路径变量类似请求参数,但没有key部分,只是一个值。例如,在app18b中,product_view动作映射到如下URL:
1 | /product_view/productId |
其中的productId是表示产品标识符的整数。在Spring MVC中,productId被称作路径变量,用来发送一个值到服务器。
下面的viewProduct方法演示了一个路径变量的使用。
使用路径变量
1 |
|
为了使用路径变量,首先需要在RequestMapping注解的值属性中添加一个变量,该变量必须放在花括号之间。例如,下面的RequestMapping注解定义了一个名为id的路径变量:
1 |
然后,在方法签名中添加一个同名变量,并加上@PathVariable注解。上面的中viewProduct的方法签名。当该方法被调用时,请求URL的id值将被复制到路径变量中,并可以在方法中使用。路径变量的类型可以不是字符串。Spring MVC将尽力转换为非字符串类型。这个Spring MVC的强大功能会在第19章中详细讨论。
可以在请求映射中使用多个路径变量。例如,下面定义了userId和orderId两个路径变量:
1 |
请直接将浏览器输入到如下URL,来测试viewProduct方法的路径变量:
http://localhost:8080/app18b/product_view/1
有时,使用路径变量时会遇到一个小问题:在某些情况下,浏览器可能会误解路径变量。考虑下面的URL:
1 | http://example.com/context/abc |
浏览器会(正确)认为abc是一个动作。任何静态文件路径的解析,如CSS文件时,将使用http://example.com/context作为基本路径。这就是说,若服务器发送的网页包含如下`img`元素:
1 | <img src="logo.png"/> |
该浏览器将试图通过http://example.com/context/logo.png来加载logo.png。
然而,若一个应用程序被部署为默认上下文(默认上下文路径是一个空字符串),则对于同一个目标的URL,会是这样的:
1 | http://example.com/abc |
下面是在带有路径变量的URL:
1 | http://example.com/abc/1 |
在这种情况下,浏览器会认为abc是上下文,没有动作。
如果在页面中使用<img src="logo. png"/>,浏览器将试图通过http://example.com/abc/logo.png来寻找图像,最终它将找不到该图像。
幸运的是,我们有一个简单的解决方案,即通过使用JSTL标记的URL(我们已经在第5章中详细讨论了JSTL)。标签会通过正确解析URL来修复该问题。例如,app18b中所有的JSP页面导入的所有CSS,从
1 | <style type="text/css">@import url(css/main.css);</style> |
修改为
1 | <style type="text/css"> |
若程序部署为默认上下文,链接标签会将该URL转换成如下形式:
1 | <style type="text/css">@import url("/css/main.css");</style> |
若程序不在默认上下文中,则它会被转换成如下形式:
1 | <style type="text/css">@import url("/app18b/css/main.css");</style> |
18.5 重定向和Flash属性
18.5 重定向和Flash属性
作为一个经验丰富的Servlet/JSP程序员,必须知道转发和重定向的区别。转发比重定向快,因为重定向经过客户端,而转发没有。但是,有时采用重定向更好。
- 若需要引入到一个外部网站,则无法使用转发,因该使用重定向
- 另一个使用重定向的场景是避免在用户重新加载页面时再次调用同样的动作。
例如,在app18a中,当提交产品表单时,saveProduct方法将被调用,并执行相应的动作。在一个真实的应用程序中,这可能包括将所述产品加入到数据库中。但是,如果在提交表单后重新加载页面,saveProduct就会被再次调用,同样的产品将可能被再次添加。为了避免这种情况,提交表单后,你可能更愿意将用户重定向到一个不同的页面。这个网页任意重新加载都没有副作用。例如,在app18a中,可以在提交表单后,将用户重定向到一个ViewProduct页面。
在app18b中,ProductController类中的saveProduct方法以如下所示的行结束:
1 | return "redirect:/product_view/" + savedProduct.getId(); |
这里,使用重定向,而不是转发来防止当用户重新加载页面时,saveProduct被二次调用。
使用重定向的一个不便的地方是:无法轻松地传值给目标页面。
而采用转发,则可以简单地将属性添加到Model,使得目标视图可以轻松访问。由于重定向经过客户端,所以Model中的一切都在重定向时丢失。
幸运的是,Spring 3.1版本以及更高版本通过**Flash属性提供了一种供重定向传值的方法**。
要使用Flash属性,必须在Spring MVC配置文件中有一个<annotation-driven/>元素。然后,还必须在方法上添加一个新的参数类型org.springframework.web.servlet.mvc.support.RedirectAttribute。
下面的代码展示了更新后的saveProduct方法。
使用Flash属性
1 |
|
18.4 应用@Autowired和@Service进行依赖注入
18.4 应用@Autowired和@Service进行依赖注入
使用Spring框架的一个好处是容易进行依赖注入。毕竟,Spring框架一开始就是一个依赖注入容器。将依赖注入到Spring MVC控制器的最简单方法是通过注解@Autowired到字段或方法。Autowired注解类型属于org.springframework.beans.factory.annotation包。
此外,**为了能被作为依赖注入,类必须要注明为@Service**。该类型是org.springframework.stereotype包的成员。Service注解类型指示类是一个服务。此外,在配置文件中,还需要添加一个<component-scan/>元素来扫描依赖基本包:
1 | <context:component-scan base-package="dependencyPackage"/> |
下面以app18b应用进一步说明Spring MVC如何应用依赖注入。在app18b应用程序中,ProductController类已经不同于app18a。
app18b的ProductController类
1 | package app18b.controller; |
与app18a中相比,app18b中的ProductController类做了一系列的调整。首先是在如下的私有字段上增加了@Autowired注解:
1 |
|
ProductService是一个提供各种处理产品方法的接口。为productService字段添加@Autowired注解会使ProductService的一个实例被注入到ProductController实例中。
下面代码分别显示了ProductService接口及其实现类ProductServiceImpl。注意,**为了使类能被Spring扫描到,必须为其标注@Service**。
ProductService接口
1 | package app18b.service; |
ProductServiceImpl类
1 | package app18b.service; |
Spring MVC配置文件
app18b的Spring MVC配置文件中有两个<component-scan/>元素;一个用于扫描控制器类,另一个用于扫描服务类。
SpringMVC配置文件
1 |
|
18.3 应用基于注解的控制器
18.3 应用基于注解的控制器
本章的示例应用app18a基于第16章和第17章的例子重写,展示了一个包含有两个请求处理方法的控制器类。app18a和前面的应用程序间的主要区别在于app18a的控制器类增加了注解@Controller。此外,Spring配置文件也增加了一些元素,后续小节中会详细介绍。
18.3.1 目录结构
以下展示了app18a的目录结构:
1 | E:\workspace_web\app18a |
注意,app18a中只有一个控制器类,而不是两个,同时新增了一个名为index.html的HTML文件,以便Spring MVC Servlet的URL模式设置为“/”时,依然可以访问静态资源。
18.3.2 配置文件
app18a有两个配置文件。第一个为部署描述符(web.xml文件),部署描述符之中注册Spring MVC的DispatcherServlet。第二个为springmvc-config.xml,即Spring MVC的配置文件。
app18a(web.xml)的部署描述符
1 |
|
请注意,在部署描述符中的<servlet-mapping/>元素,Spring MVC的dispatcher-servlet的URL模式设置为“/”,而不是第17章中的.action。实际上,映射动作(action)不必一定要用某种URL扩展。当然,当 URL模式设置为“/”时,意味着所有请求(包括那些用于静态资源)都被映射到 DispatcherServlet。为了正确处理静态资源,需要在 Spring MVC 配置文件中添加一些<resources/>元素。
springmvc-config.xml文件
1 |
|
springmvc-config.xml中最主要的是<component-scan/>元素。这是要指示Spring MVC扫描目标包中的类,本例是app18a.controller包。接下去是一个<annotation-driven/>元素和两个<resources/>元素。<annotation-driven/>元素做的事情包括注册用于支持基于注解的控制器的请求处理方法的bean对象。<resources/>元素则指示Spring MVC哪些静态资源需要单独处理(不通过DispatcherServlet)。springmvc-config.xml中有两个<resources/>元素。第一个确保在/CSS 目录下的所有文件可见,第二个允许显示所有的.html文件。
注意:
如果没有<annotation-driven/>,<resources/>元素会阻止任意控制器被调用。若不需要使用resources,则不需要<annotation-driven/>元素。
18.3.3 Controller类
如前所述,使用Controller注解类型的一个优点在于:一个控制器类可以包含多个请求处理方法。如清单18.3,ProductController类中有inputProduct和saveProduct两种方法。
ProductController类
1 | package app18a.controller; |
其中,ProductController的saveProduct方法的第二个参数是org.springframework.ui.Model类型。无论是否会使用,**Spring MVC 都会在每一个请求处理方法被调用时创建一个 Model实例,使用Model的主要目的是添加需要在视图中显示的属性**。本例中,通过调用model.addAttribute来添加Product实例:
1 | model.addAttribute("product", product); |
Product实例就可以像被添加到HttpServletRequest中那样访问了。
18.3.4 View
app18a也有类似前面章节示例的两个视图:ProductForm.jsp页面和ProductDetails.jsp页面
ProductForm.jsp页面
1 | <!DOCTYPE HTML> |
ProductDetails.jsp页面
1 | <!DOCTYPE HTML> |
18.3.5 测试应用
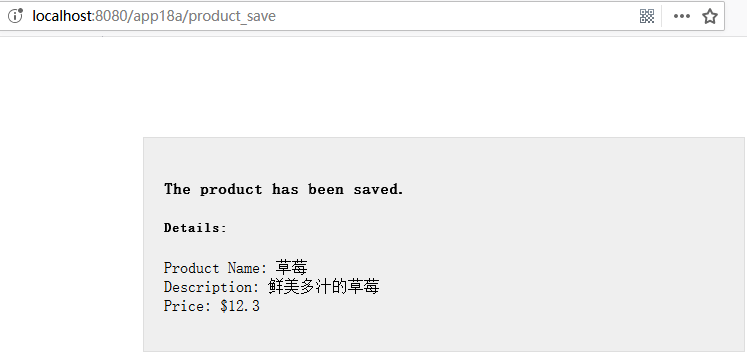
下面在浏览器中输入如下URL来测试app18a:
http://localhost:8080/app18a/product_input
浏览器会显示Product表单,如下图所示: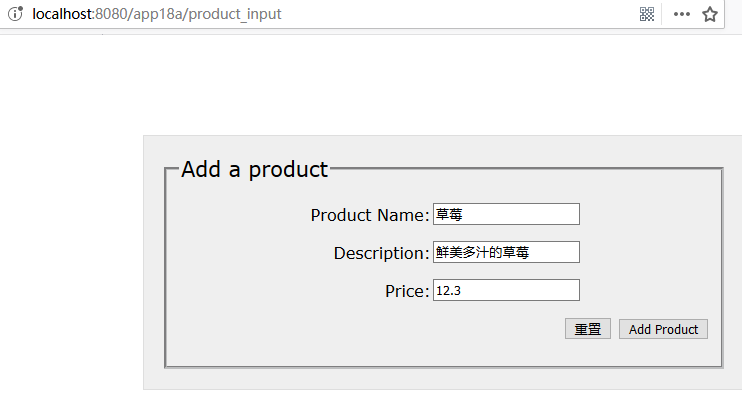
填写表单,单击Add Product按钮,会调用saveProduct方法,运行效果如下图所示: