18.3 应用基于注解的控制器
本章的示例应用app18a基于第16章和第17章的例子重写,展示了一个包含有两个请求处理方法的控制器类。
app18a和前面的应用程序间的主要区别在于app18a的控制器类增加了注解@Controller。此外,Spring配置文件也增加了一些元素,后续小节中会详细介绍。
18.3.1 目录结构
以下展示了app18a的目录结构:
1
2
3
4
5
6
7
8
9
10
11
12
13
14
15
16
17
18
19
20
21
22
23
24
25
26
27
28
29
30
31
| E:\workspace_web\app18a
├─src
│ ├─main
│ │ ├─java
│ │ │ └─app18a
│ │ │ ├─controller
│ │ │ ├─domain
│ │ │ └─form
│ │ ├─resources
│ │ └─webapp
│ │ ├─css
│ │ ├─META-INF
│ │ └─WEB-INF
│ │ ├─config
│ │ ├─jsp
│ │ └─lib
│ └─test
│ └─java
└─target
├─classes
│ └─app18a
│ ├─controller
│ ├─domain
│ └─form
├─m2e-wtp
│ └─web-resources
│ └─META-INF
│ └─maven
│ └─com.lan
│ └─app18a
└─test-classes
|
注意,app18a中只有一个控制器类,而不是两个,同时新增了一个名为index.html的HTML文件,以便Spring MVC Servlet的URL模式设置为“/”时,依然可以访问静态资源。
18.3.2 配置文件
app18a有两个配置文件。第一个为部署描述符(web.xml文件),部署描述符之中注册Spring MVC的DispatcherServlet。第二个为springmvc-config.xml,即Spring MVC的配置文件。
app18a(web.xml)的部署描述符
1
2
3
4
5
6
7
8
9
10
11
12
13
14
15
16
17
18
19
20
| <?xml version="1.0" encoding="UTF-8"?>
<web-app version="3.0" xmlns="http://java.sun.com/xml/ns/javaee"
xmlns:xsi="http://www.w3.org/2001/XMLSchema-instance"
xsi:schemaLocation="http://java.sun.com/xml/ns/javaee http://java.sun.com/xml/ns/javaee/web-app_3_0.xsd">
<servlet>
<servlet-name>springmvc</servlet-name>
<servlet-class>
org.springframework.web.servlet.DispatcherServlet
</servlet-class>
<init-param>
<param-name>contextConfigLocation</param-name>
<param-value>/WEB-INF/config/springmvc-config.xml</param-value>
</init-param>
<load-on-startup>1</load-on-startup>
</servlet>
<servlet-mapping>
<servlet-name>springmvc</servlet-name>
<url-pattern>/</url-pattern>
</servlet-mapping>
</web-app>
|
请注意,在部署描述符中的<servlet-mapping/>元素,Spring MVC的dispatcher-servlet的URL模式设置为“/”,而不是第17章中的.action。实际上,映射动作(action)不必一定要用某种URL扩展。当然,当 URL模式设置为“/”时,意味着所有请求(包括那些用于静态资源)都被映射到 DispatcherServlet。为了正确处理静态资源,需要在 Spring MVC 配置文件中添加一些<resources/>元素。
springmvc-config.xml文件
1
2
3
4
5
6
7
8
9
10
11
12
13
14
15
16
17
18
19
20
21
22
23
24
| <?xml version="1.0" encoding="UTF-8"?>
<beans xmlns="http://www.springframework.org/schema/beans"
xmlns:xsi="http://www.w3.org/2001/XMLSchema-instance"
xmlns:p="http://www.springframework.org/schema/p"
xmlns:mvc="http://www.springframework.org/schema/mvc"
xmlns:context="http://www.springframework.org/schema/context"
xsi:schemaLocation="
http://www.springframework.org/schema/beans
http://www.springframework.org/schema/beans/spring-beans.xsd
http://www.springframework.org/schema/mvc
http://www.springframework.org/schema/mvc/spring-mvc.xsd
http://www.springframework.org/schema/context
http://www.springframework.org/schema/context/spring-context.xsd">
<context:component-scan
base-package="app18a.controller" />
<mvc:annotation-driven />
<mvc:resources mapping="/css/**" location="/css/" />
<mvc:resources mapping="/*.html" location="/" />
<bean id="viewResolver"
class="org.springframework.web.servlet.view.InternalResourceViewResolver">
<property name="prefix" value="/WEB-INF/jsp/" />
<property name="suffix" value=".jsp" />
</bean>
</beans>
|
springmvc-config.xml中最主要的是<component-scan/>元素。这是要指示Spring MVC扫描目标包中的类,本例是app18a.controller包。接下去是一个<annotation-driven/>元素和两个<resources/>元素。<annotation-driven/>元素做的事情包括注册用于支持基于注解的控制器的请求处理方法的bean对象。<resources/>元素则指示Spring MVC哪些静态资源需要单独处理(不通过DispatcherServlet)。
springmvc-config.xml中有两个<resources/>元素。第一个确保在/CSS 目录下的所有文件可见,第二个允许显示所有的.html文件。
注意:
如果没有<annotation-driven/>,<resources/>元素会阻止任意控制器被调用。若不需要使用resources,则不需要<annotation-driven/>元素。
18.3.3 Controller类
如前所述,使用Controller注解类型的一个优点在于:一个控制器类可以包含多个请求处理方法。如清单18.3,ProductController类中有inputProduct和saveProduct两种方法。
ProductController类
1
2
3
4
5
6
7
8
9
10
11
12
13
14
15
16
17
18
19
20
21
22
23
24
25
26
27
28
29
30
31
32
33
34
35
36
37
38
39
| package app18a.controller;
import org.apache.commons.logging.Log;
import org.apache.commons.logging.LogFactory;
import org.springframework.stereotype.Controller;
import org.springframework.ui.Model;
import org.springframework.web.bind.annotation.RequestMapping;
import app18a.domain.Product;
import app18a.form.ProductForm;
@Controller
public class ProductController
{
private static final Log logger = LogFactory
.getLog(ProductController.class);
@RequestMapping(value = "/product_input")
public String inputProduct()
{
logger.info("inputProduct called");
return "ProductForm";
}
@RequestMapping(value = "/product_save")
public String saveProduct(ProductForm productForm,Model model)
{
logger.info("saveProduct called");
Product product = new Product();
product.setName(productForm.getName());
product.setDescription(productForm.getDescription());
try
{
product.setPrice(Float.parseFloat(
productForm.getPrice()));
} catch (NumberFormatException e)
{}
model.addAttribute("product", product);
return "ProductDetails";
}
}
|
其中,ProductController的saveProduct方法的第二个参数是org.springframework.ui.Model类型。无论是否会使用,**Spring MVC 都会在每一个请求处理方法被调用时创建一个 Model实例,使用Model的主要目的是添加需要在视图中显示的属性**。本例中,通过调用model.addAttribute来添加Product实例:
1
| model.addAttribute("product", product);
|
Product实例就可以像被添加到HttpServletRequest中那样访问了。
18.3.4 View
app18a也有类似前面章节示例的两个视图:ProductForm.jsp页面和ProductDetails.jsp页面
1
2
3
4
5
6
7
8
9
10
11
12
13
14
15
16
17
18
19
20
21
22
23
24
25
26
27
28
29
30
31
32
33
34
35
36
37
| <!DOCTYPE HTML>
<html>
<head>
<title>Add Product Form</title>
<style type="text/css">
@import url(css/main.css);
</style>
</head>
<body>
<div id="global">
<form action="product_save" method="post">
<fieldset>
<legend>Add a product</legend>
<p>
<label for="name">Product Name: </label> <input
type="text" id="name" name="name" tabindex="1">
</p>
<p>
<label for="description">Description: </label> <input
type="text" id="description" name="description"
tabindex="2">
</p>
<p>
<label for="price">Price: </label> <input
type="text" id="price" name="price" tabindex="3">
</p>
<p id="buttons">
<input id="reset" type="reset" tabindex="4">
<input id="submit" type="submit" tabindex="5"
value="Add Product">
</p>
</fieldset>
</form>
</div>
</body>
</html>
|
ProductDetails.jsp页面
1
2
3
4
5
6
7
8
9
10
11
12
13
14
15
16
17
18
19
| <!DOCTYPE HTML>
<html>
<head>
<title>Save Product</title>
<style type="text/css">
@import url(css/main.css);
</style>
</head>
<body>
<div id="global">
<h4>The product has been saved.</h4>
<p>
<h5>Details:</h5>
Product Name: ${product.name}<br /> Description:
${product.description}<br /> Price: $${product.price}
</p>
</div>
</body>
</html>
|
18.3.5 测试应用
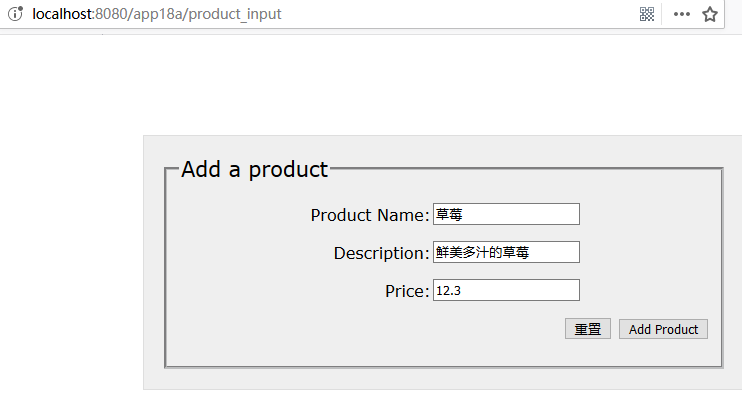
下面在浏览器中输入如下URL来测试app18a:
http://localhost:8080/app18a/product_input
浏览器会显示Product表单,如下图所示:
![这里有一张图片]()
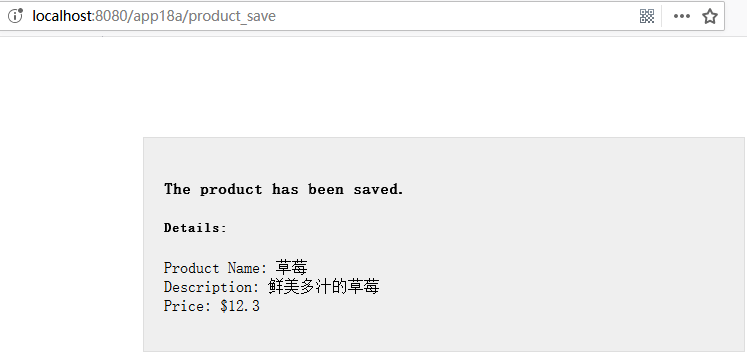
填写表单,单击Add Product按钮,会调用saveProduct方法,运行效果如下图所示:
![这里有一张图片]()